Arduino LED Blink Tutorial for Beginners
A Step-by-Step Guide to Your First Arduino Project
Introduction
Welcome to Zenith Electronics! If you’re just starting with Arduino, this tutorial is the perfect place to begin. We’ll walk you through how to build your first simple project—making an LED blink using an Arduino board. Whether you are new to electronics or just looking to start a DIY project, this step-by-step guide will help you get up and running in no time.
By the end of this tutorial, you will have learned:
- How to set up an Arduino board
- How to write a basic program (sketch) in the Arduino IDE
- How to make an LED blink
What You’ll Need
Here’s a list of components for this project:
- Arduino Uno (or any compatible Arduino board)
- LED (any color)
- 220-ohm resistor
- USB cable (to connect the Arduino to your computer)
If you don’t have these components yet, check out our store at http://www.zenithelectronics.lk for affordable Arduino starter kits.
Are you ready to dive into the exciting world of Arduino and light up your first project? In this beginner-friendly tutorial, we will guide you through the process of creating a simple LED blink project using Arduino. So, grab your Arduino board, some basic components, and let’s get started!
Setting Up the Arduino IDE
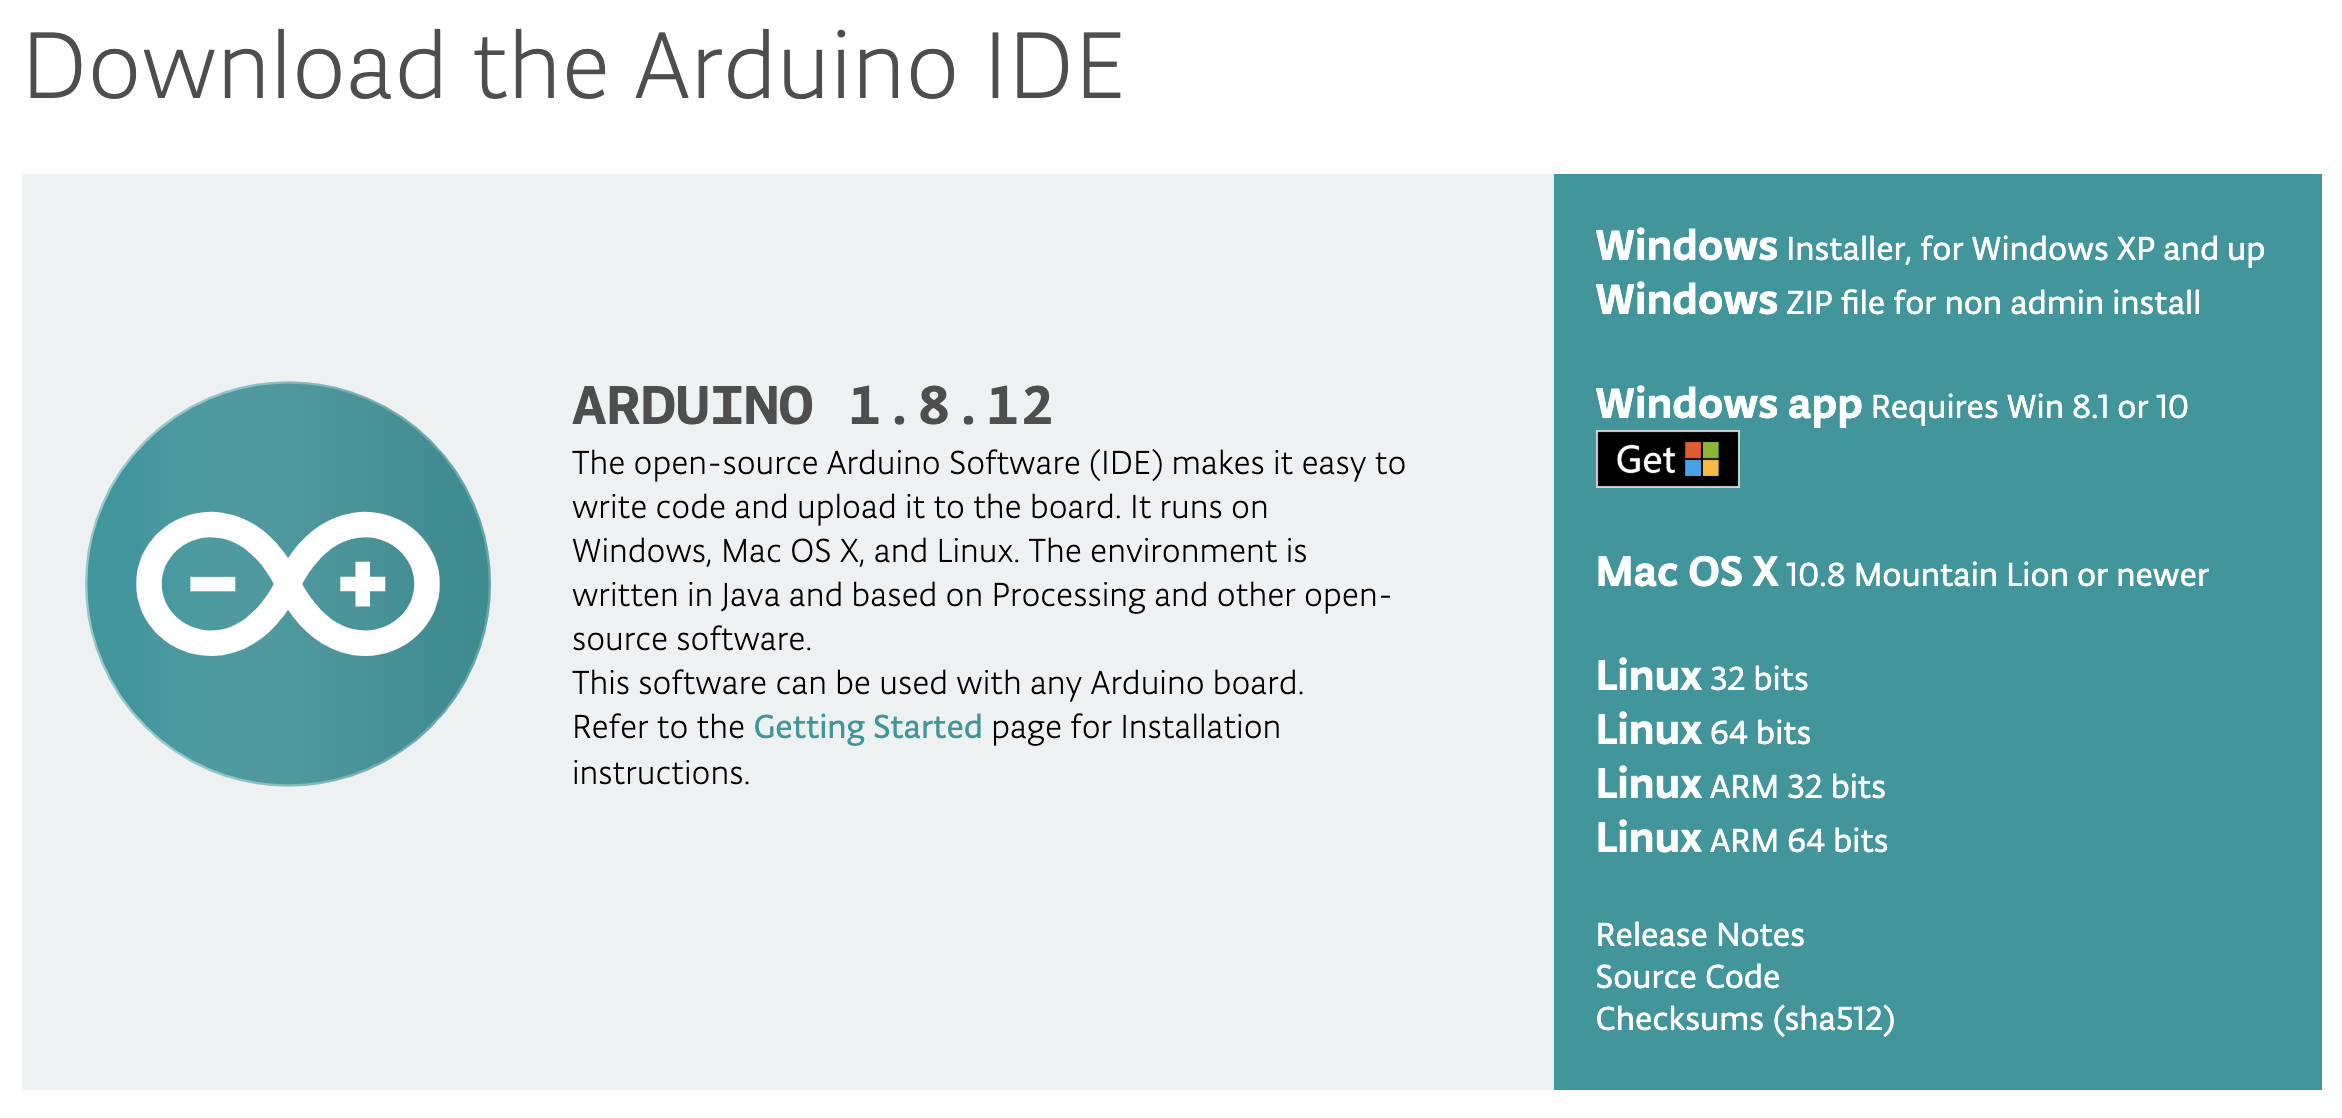
Before we can start working on our LED blink project, we need to set up the Arduino Integrated Development Environment (IDE) on our computer. The Arduino IDE is where we will write and upload the code to our Arduino board. You can download the Arduino IDE for free from the official Arduino website and install it on your computer.
Build the Circuit
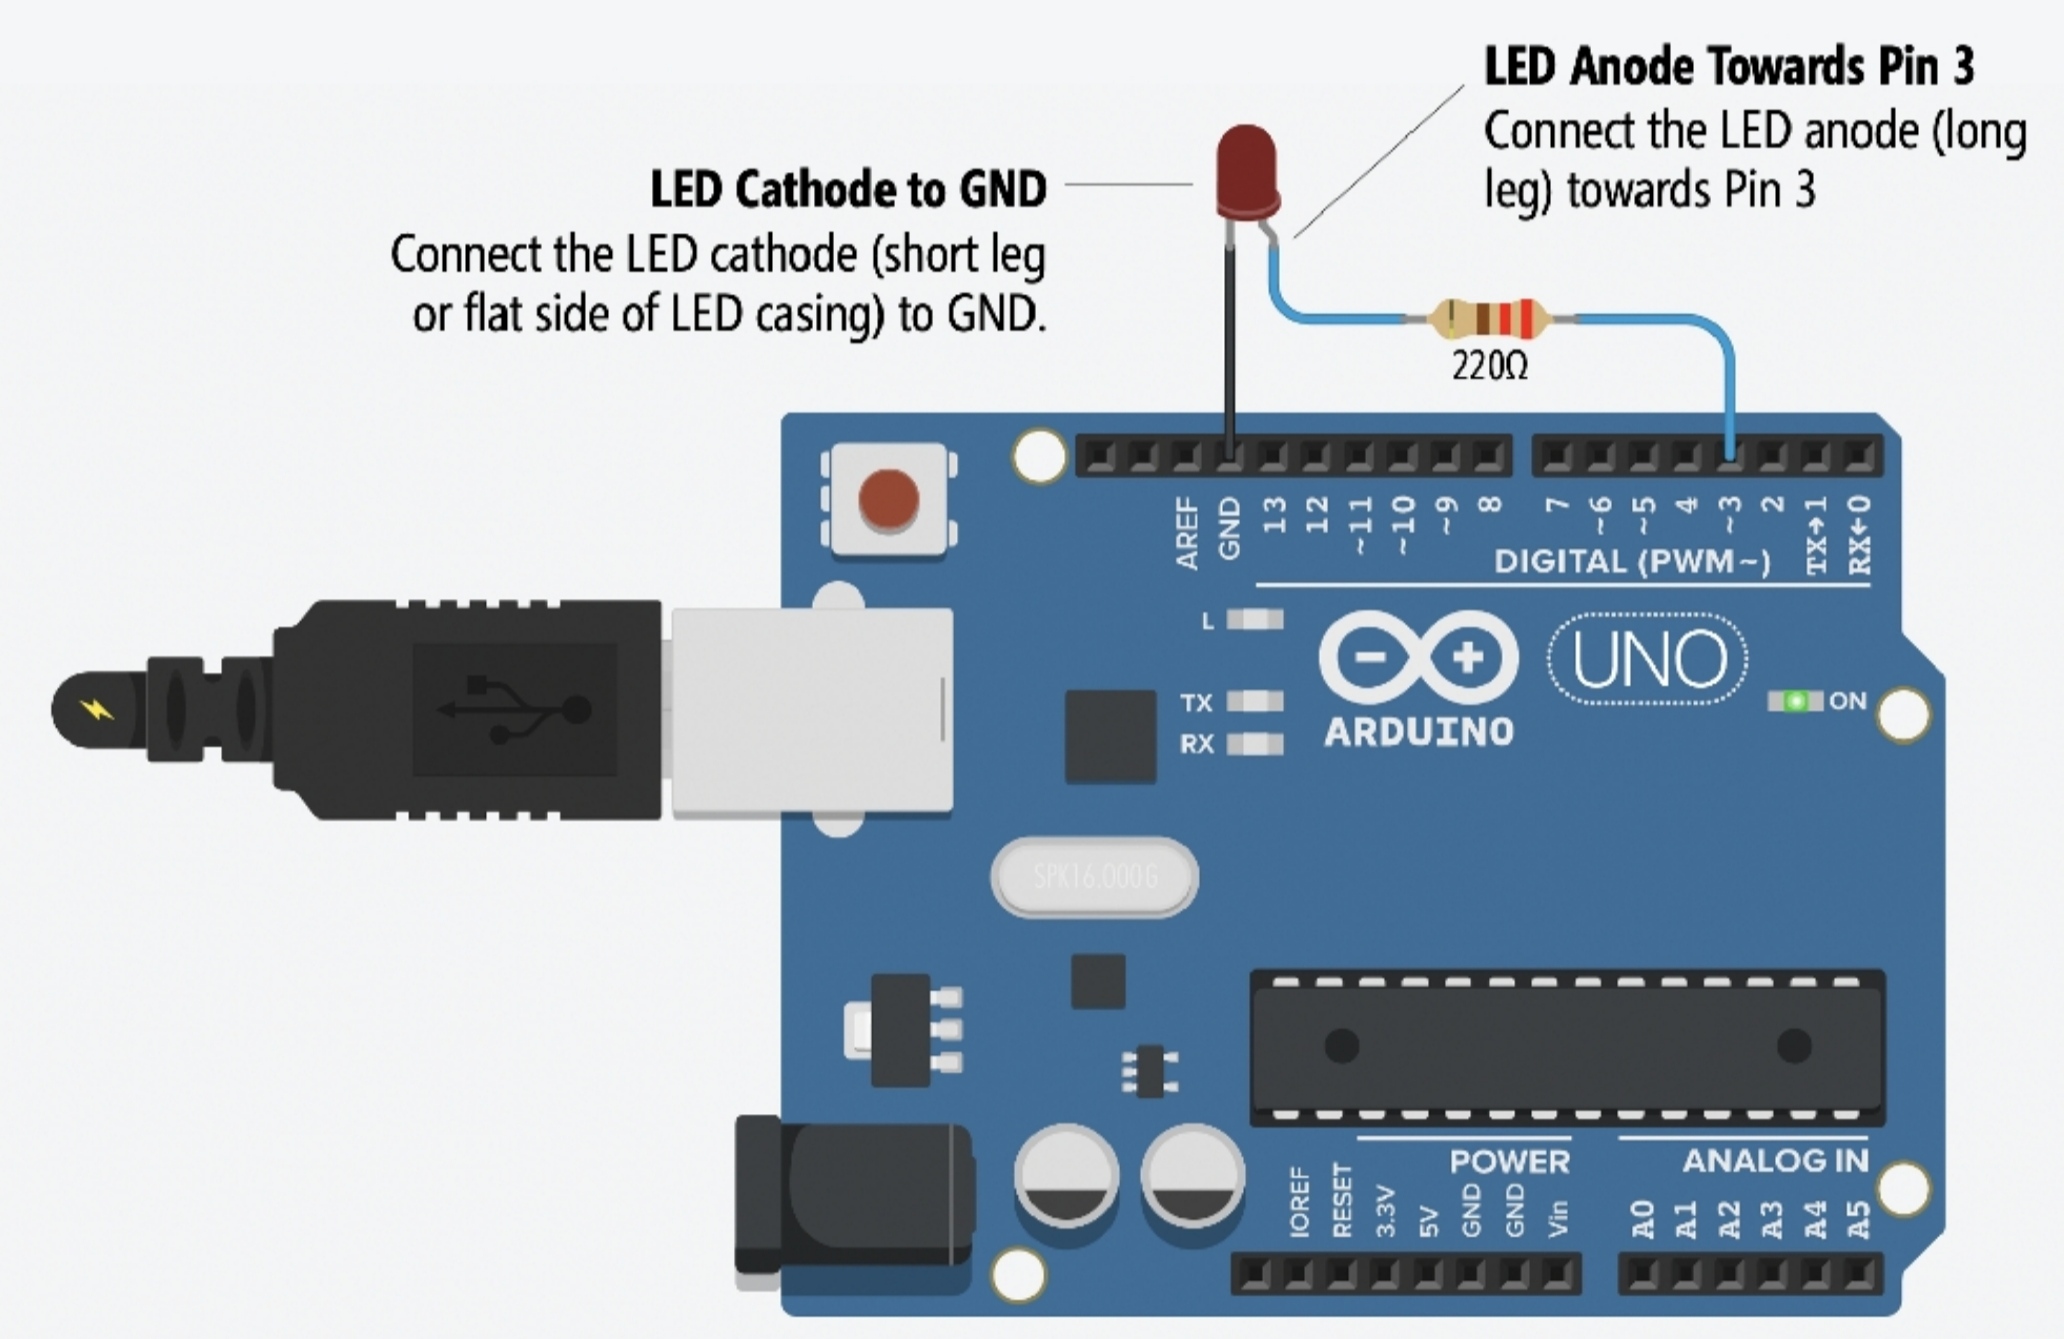
Once the Arduino IDE is set up, it’s time to build the circuit for our LED blink project.
Connect the positive leg of the LED to digital pin 3 on the Arduino board through a resistor, and the negative leg to the ground pin on the board.
Writing the Code
Now that the circuit is set up, it’s time to write the code that will make our LED blink. Here’s what this code does:
setup(): This function runs once when you press reset. It tells the Arduino to set Pin 3 as an output.
loop(): This function runs continuously. It turns the LED on, waits for 1 second, then turns it off and waits another second, creating the blink effect
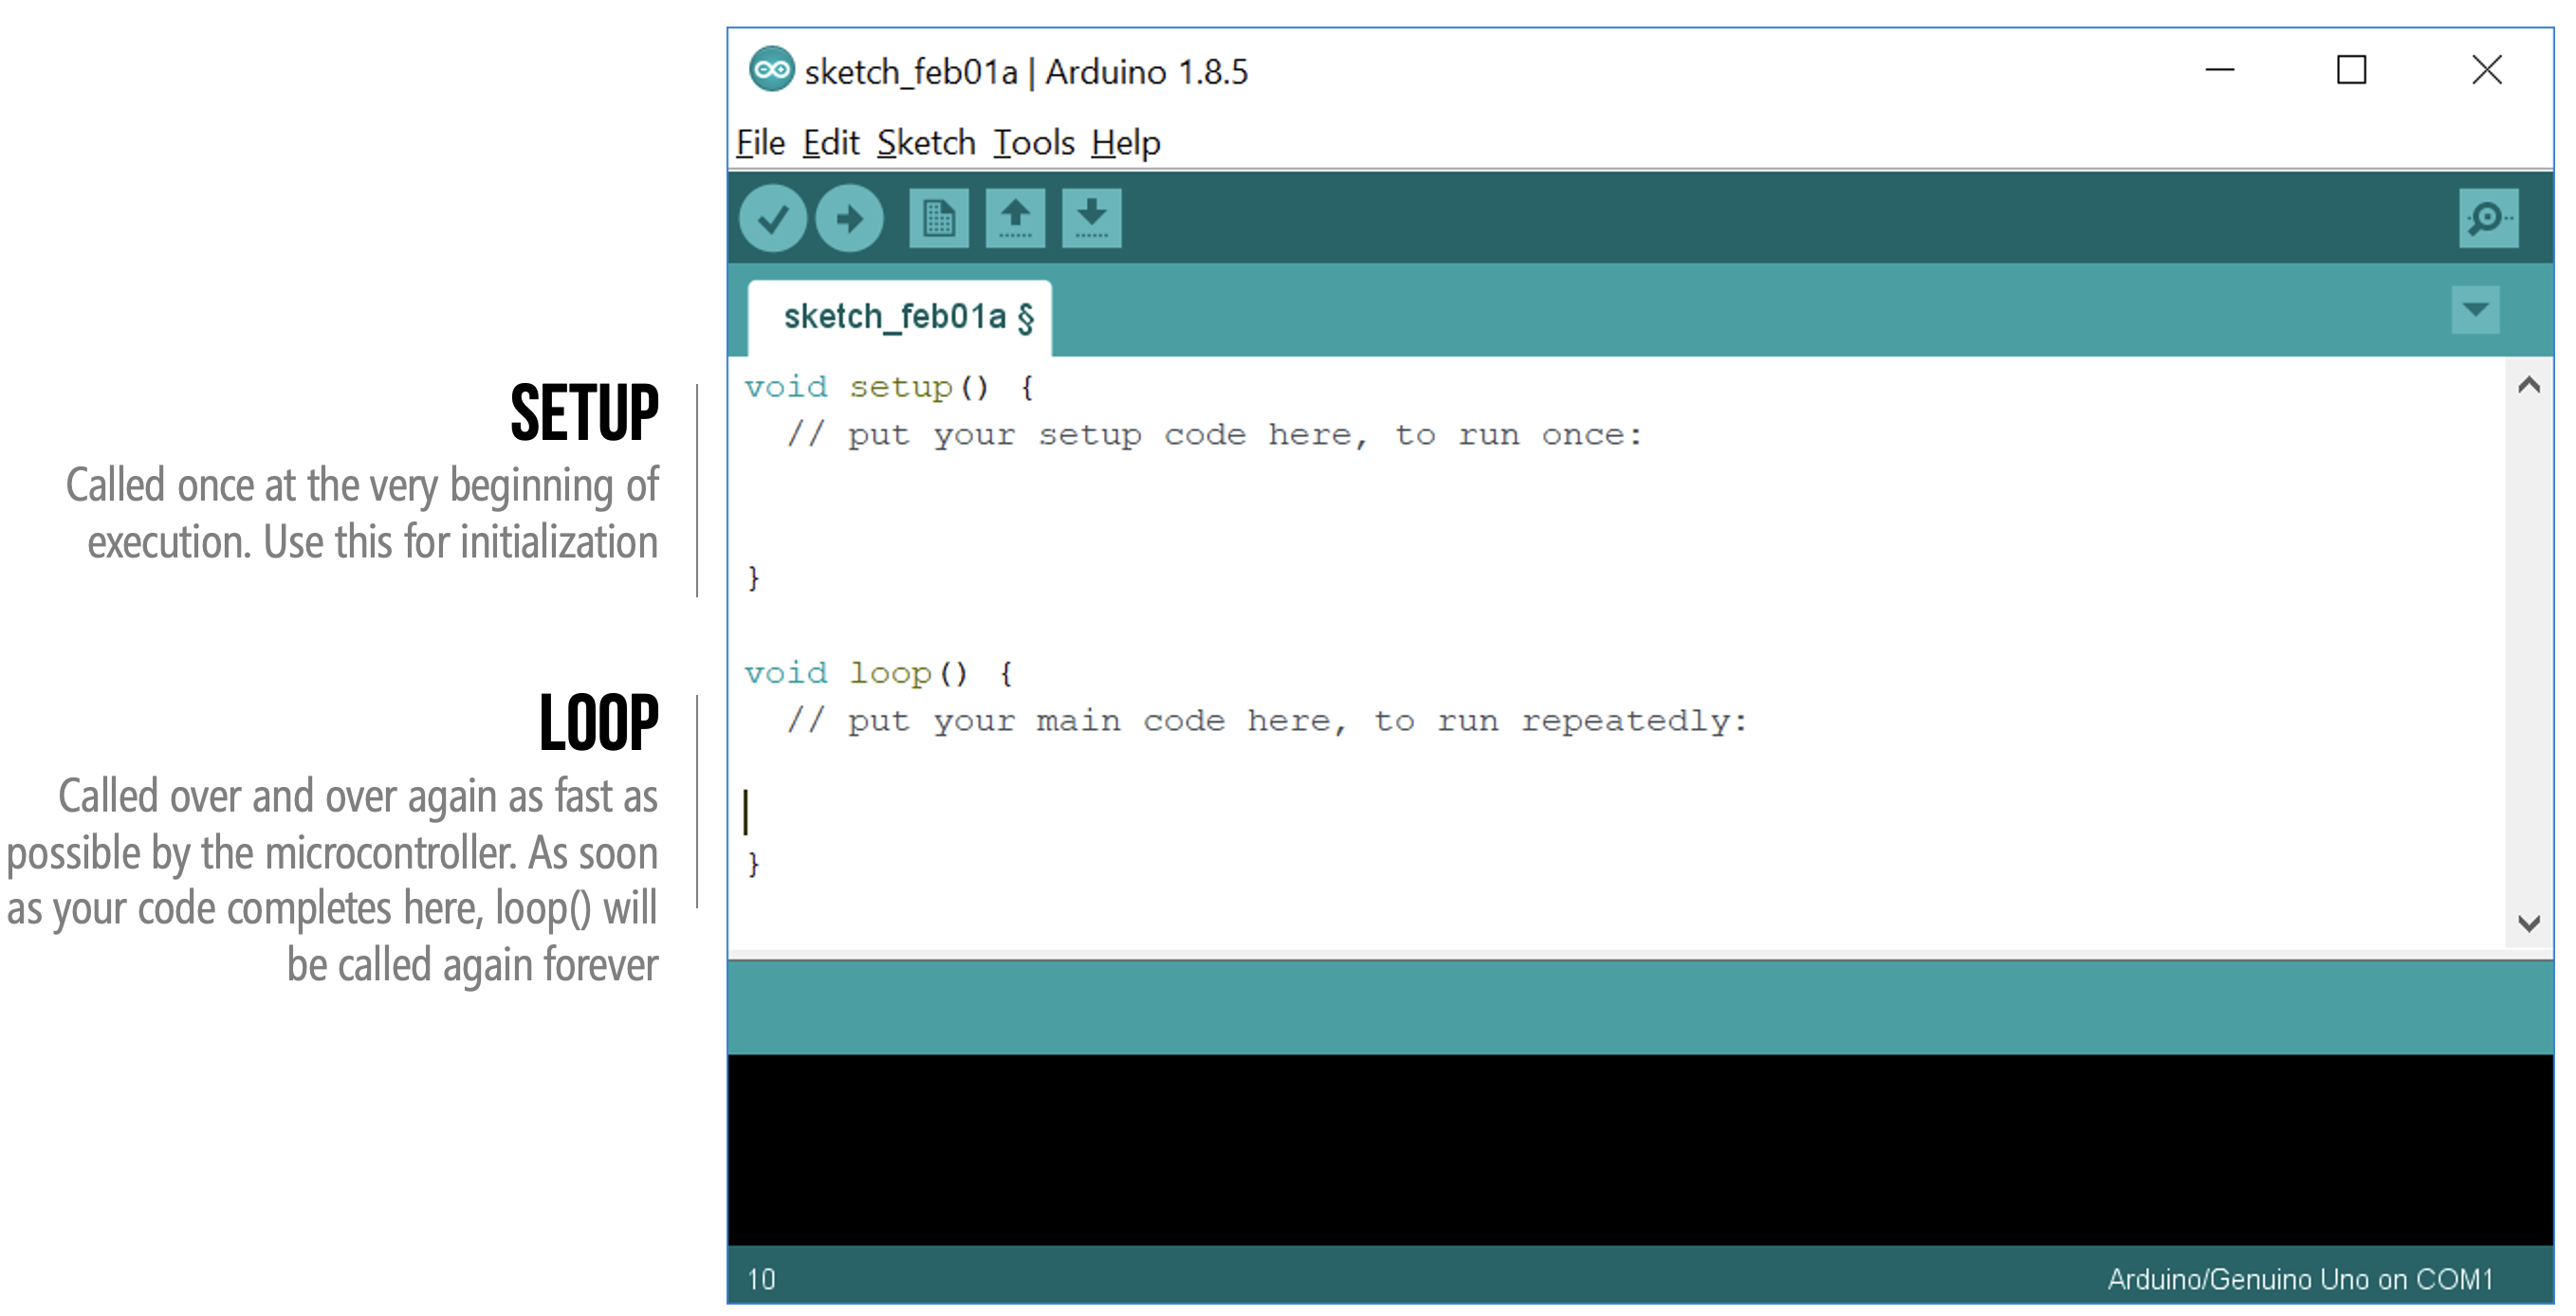
Open the Arduino IDE, create a new sketch, and type in the following code:
void setup() {
pinMode(3, OUTPUT);
}
void loop() {
digitalWrite(3, HIGH);
delay(1000);
digitalWrite(3, LOW);
delay(1000);
}
This code sets pin 3 as an output pin and turns the LED on and off with a one-second delay between each state.
Upload the Code
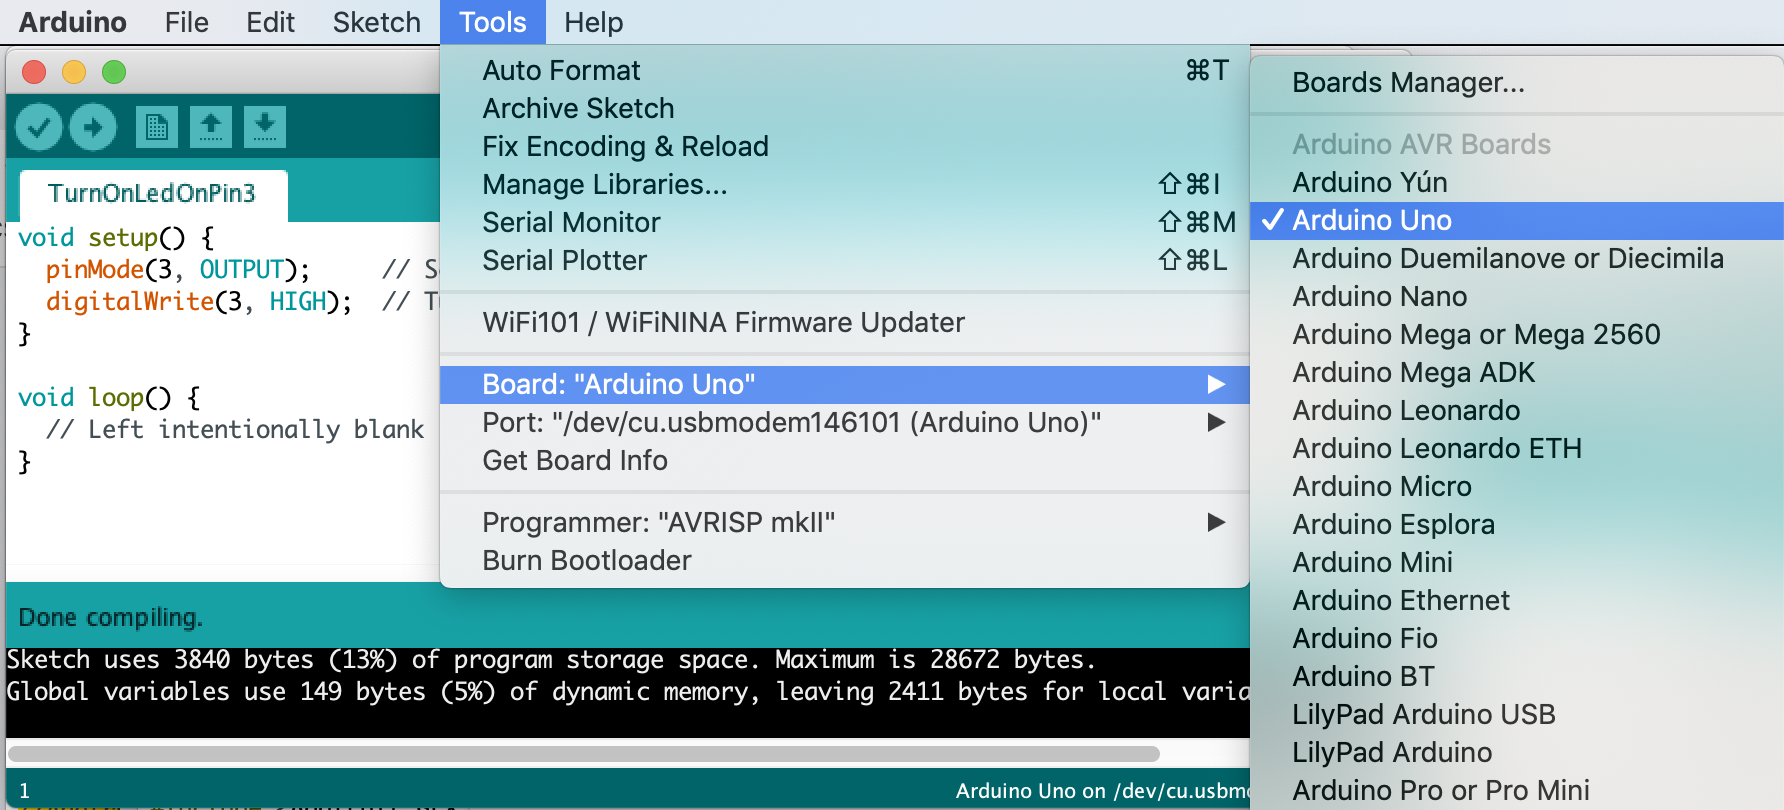
With the code written, it’s time to upload it to the Arduino board. Connect the Arduino board to your computer using a USB cable, select the correct board and port in the Arduino IDE, and click the upload button. The code will be compiled and uploaded to the Arduino board, and you will see the LED start blinking.
- Connect Your Arduino board to the computer with the USB cable.
- In the Arduino IDE, go to Tools > Board and select your board, then choose the correct Port.
- Click the Upload button (right arrow) to upload the code to your Arduino.
Troubleshooting
If your LED is not blinking as expected, don’t worry! Troubleshooting is a normal part of the learning process. Check your connections, make sure the code is correct, and try uploading it again. If you’re still having trouble, don’t hesitate to reach out to the Arduino community for help.
Congratulations!
You’ve just built your first Arduino project and successfully made an LED blink. This is a foundational project that will give you the confidence to explore more complex projects in the future. Stay tuned for more tutorials, and don’t forget to visit Zenith Electronics for all your electronics needs.
If you enjoyed this tutorial, consider subscribing to our YouTube channel for more Arduino and electronics projects!
—
Call-to-Action:
If you have any questions or suggestions, feel free to leave a comment below.
Follow us on YouTube and Facebook for more tutorials and updates.
Explore More: Check out our Arduino Starter Kits and other DIY electronics components on Zenith Electronics.
—



Add comment